Friday, 19 October 2012

12 Weeks of Christmas WEEK 3 - No Peeking Reindeer Card

WEEK 3

Sorry it has been a while between posts.  I am having a few computer troubles involving a 4 yr old boy and a smashed laptop screen and have had to do a lot via my phone while my precious computer gets fixed.

Here is the Week 3 card for my 12 weeks of Christmas promotion.  Please excuse the photo :(
How cute is the little reindeer in the No Peeking Stamp Set. He is popped up on dimensionals and cut out using one of the window frames collection framelits.

Week 10 -  No Peeking Window Framelit card

Stamp Set: No Peeking,Greetings of the Season.
Paper:  Very Vanilla, Real Red, Red Glimmer Paper ( nose), Candelight Christmas Specialty DSP. 
Ink:  Early Espresso, Real Red.
Cool Tools: Big Shot, Perfect Polka Dots EF,  Window Frames Collection Framelits, Standard Hole Punch,  Paper Piercer, Early Espresso 1/8" Taffeta Ribbon, Dimensionals.

Tha
nks For Looking,
TRICIA  

Tuesday, 16 October 2012

Core'dinations Cardstock Creations

Stampin' Up! have released some lovely products in their Holiday Catalogue and one I had originally overlooked was the Core'dinations Cardstock on page 6.  It comes in 3 different colours: Gumball Green, Cherry Cobbler & Early Espresso.  There is a Stampin' Sanding System that includes a sanding block with 4 sheets of sandpaper in 2 grits to use with it.  The Core'dinations Dust Buddy is a great little tacky cloth that picks up the debris from sanding and is great for cleaning up all that mess! 

The Core'dinations cardstock is textured on one side and flat on the other & comes in 12 x 12 size. You can tear, distress or do what I did and run it through an embossing folder and the bigshot and then sand back the impressions.  One tip I have is to sand VERY lightly as this cardstock is thin and tears easily. The best way I have found is to go over it a few times in a light circular sanding motion.  

I was thinking up ideas for my stamp club girls and decided we would try this cardstock out for our cards.  Here are the two cards we made in stamp club.

Everything Eleanor & Cherry Cobbler Core'dinations Card
For the 1st card we used the new Fancy Fan Embossing Folder with the Cherry Cobbler Core'dinations card stock.  This was lightly distressed with the Sanding System.  The Cherry Cobbler & Gumball Green Core'dination card stock do not sand back to a different colour - just slightly lighter.  Whereas the Early Espresso has a Crumb Cake coloured core and creates a striking difference. 
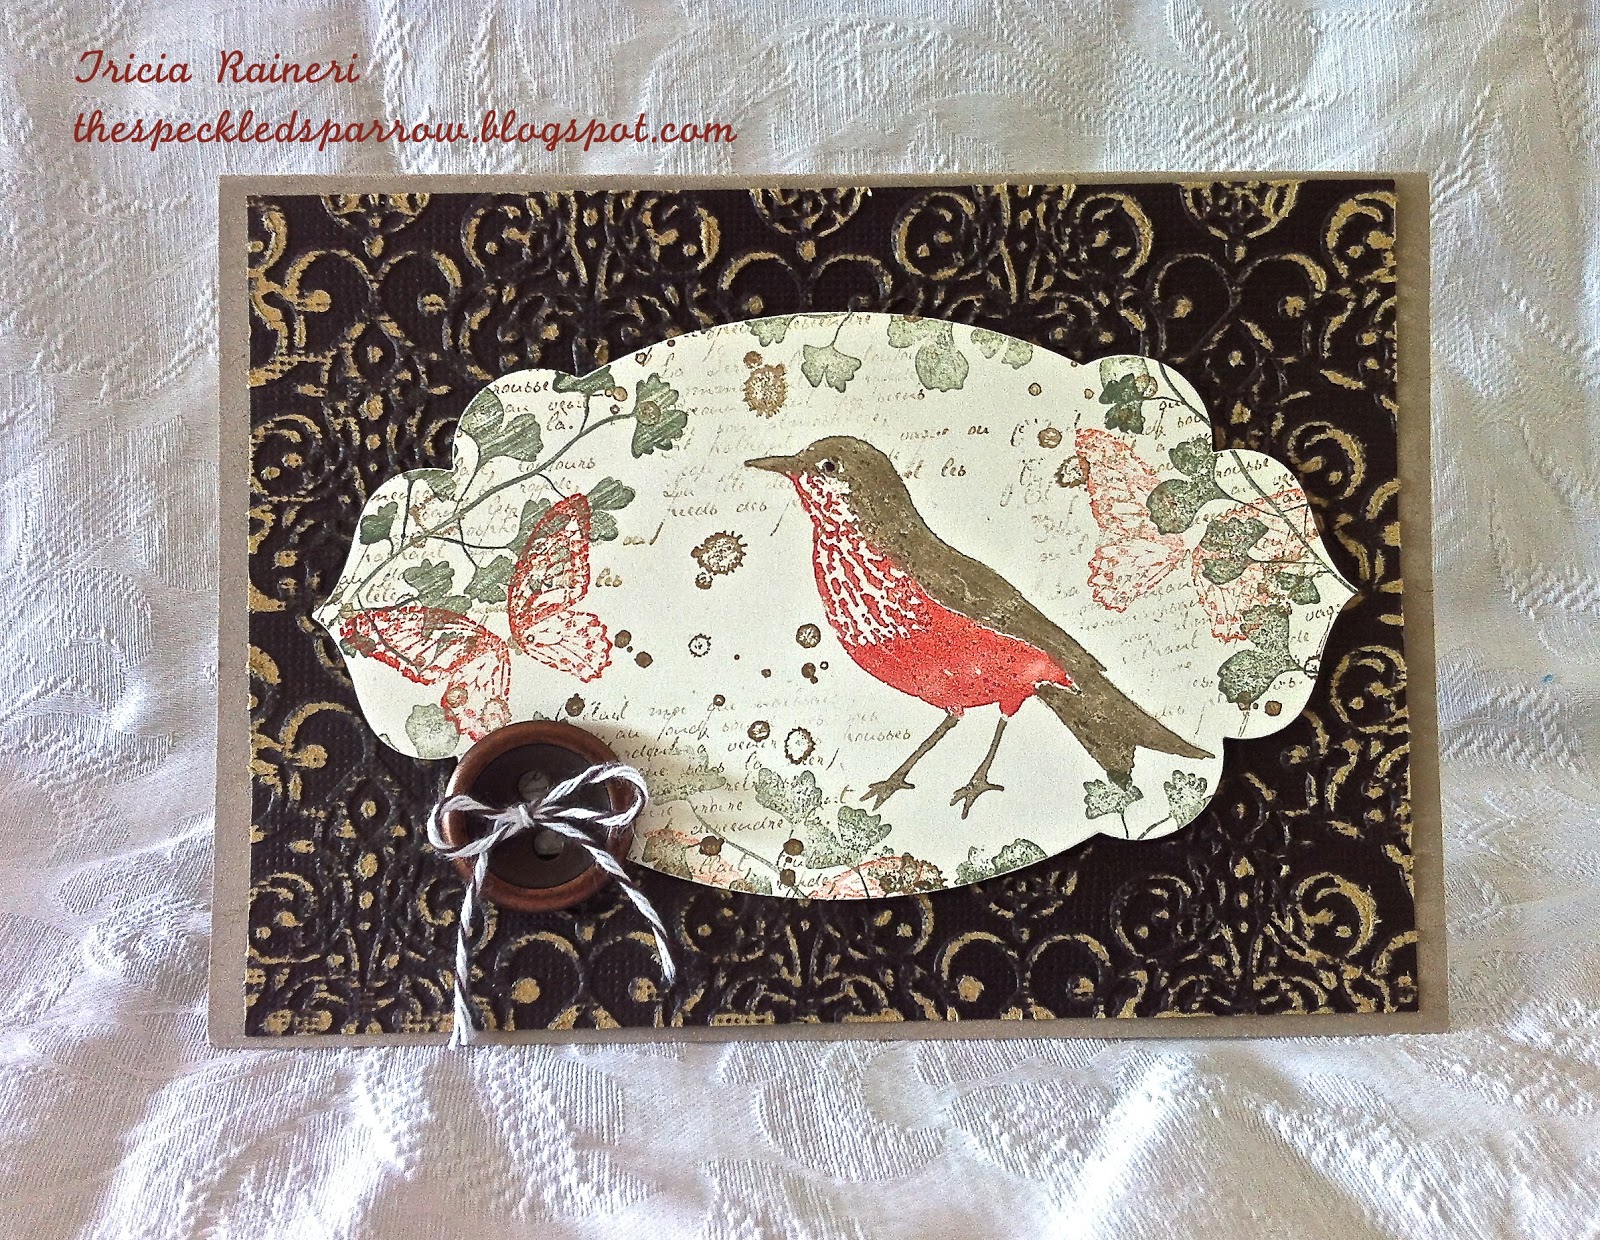
Papaya Collage & Early Espresso Core'dinations Card.

I was lucky enough to make this card at a team day recently with Tracy Penn, and decided it would be perfect to display the Early Espresso Core'dination Cardstock.  For this card we ran the cardstock through the Lacy Brocade Embossing Folder (also in the Holiday Catalogue) and sanded it lightly with the Sanding System.  We also used the large fancy framelit from the Apothecary Accents Framelits.  I love those new Brushed Bronze Buttons in the Holiday Catalogue (p. 32) too!  

CARD 1
Stamp Set: Everything Eleanor, Bring on The Cake.
Paper:  Soft Suede, Very Vanilla, Cherry Cobbler Core'dinations Cardstock. 
Ink:  Soft Suede, Cherry Cobbler, Crumb Cake (sponging)
Cool Tools: Big Shot,  Fancy Fan EF,  Window Frames Collection Framelits, Paper Snips, Pearls, paper Piercer, Sponge Dauber, 2 Step Bird Punch, Dimensionals, Victoria Crochet Trim, Stampin' Sanding System.

CARD 2
Stamp Set: Papaya Collage, French Foliage.
Paper:  Very Vanilla, Crumb Cake, Early Espresso Core'dinations Cardstock. 
Ink:  Soft Suede, Always Artichoke, Calypso Coral.
Cool Tools: Big Shot,  Lacy Brocade EF,  Apothecary Accents Framelits, Dimensionals, Early Espresso Bakers Twine, Brushed Bronze Designer Buttons, Stampin' Sanding System.

Thanks For Looking,
TRICIA 


Thursday, 11 October 2012

Bitty Banner Butterfly Birthday

Say that 5 times fast and see how you go!  I have been really good and held off buying everything new in the catalogues (I know what self control I have!) but this last order I just had to get myself the lovely new Butterfly Punch.  It is much finer and more dainty than the old butterfly punch, but just as versatile.

One of my customers is having a birthday this week and I made her this card to brighten her day.  Happy Birthday Tracy - hope you had a wonderful day!  I have used lots & lots of new products because I just couldn't help myself :)


Stamp Set: Itty Bitty Banners. 
Paper:  Primrose Petals, Pool Party, Whisper White, Patio Party DSP 
Ink:  Primrose Petals & Pool Party Markers
Cool Tools: Big Shot,  Fancy Fan EF, Finishing Touches Edgelits, Butterfly Punch, Itty Bitty Shapes Punch Pack, Rhinestones, Bitty Banners Framelits, Apothecary Accents Framelits, dimensionals. 

Thanks For Looking,
TRICIA 


Wednesday, 10 October 2012

12 Weeks of Christmas WEEK 2- Santa & Rudolph Boxes


WEEK 2:
The Top Note Die is seriously one of the most versatile dies Stampin' Up! sell.  It comes into it's own around Christmas time in my home where it gets a total work out!  I use it for lots of things from gift bag toppers, money and gift card holders to these cute little boxes.

Top Note Santa & Rudolph gift boxes
You need to get a bit crafty with your punches to make these but they are well worth the effort.  In between each Top Note Die is a Fancy Favour box.  You can fill these with a bag of lollies, chocolate, anything that you can find that fits in the box.  For Santa I have used the new Lacy Brocade embossing folder. ( I did warn you I would be going crazy with this folder!)  I have included what you need to create these guys, but if you would like a detailed tutorial, let me know & I can email you one.

TO MAKE RUDOLPH you will need: Cut 2 x Chocolate Chip Top Note dies(face and back)Cut 1 x  Chocolate Chip Fancy Favour Box Punch 2 x White  Large Ovals (eyes)Punch 2 x Crumb Cake Large Ovals  (inner ears)Punch 1 x Chocolate Chip Large Oval (cut in half for eyelids)Punch 2 x  Extra Large Chocolate Chip Ovals (outer ears)Punch 2 x Basic Black Small Ovals (eyes with white gel pen stripe)Punch 1 x Crumb cake 1 3/8" Circle (face)Punch 1 x Red Glimmer Paper 3/4" Circle (nose)Antlers are made with Swirls Scribbles Sizzlit ( now retired) but can be made with 2 x prongs from the largest snowflake in Snow Flurry die. 

TO MAKE SANTA you will need:Cut 1 x Pink Pirouette Top NoteCut 2 x Real Red Top Note ( 1 for back and 1 cut in half for hat)Cut 1 x Real Red Fancy Favour BoxCut 1 x Whisper White Top Note ( emboss with lacy Brocade EF & Cut down)Punch 2 x Whisper White 3/4" Circles ( eyes)Punch 2 x Basic Black 1/2" Circles (eyes with white gel pen stripe)Punch 1 x Pink Pirouette 3/4" Circle s (cut in half for eyelids)Punch 1 x Real Red 3/4" Circle (cut in half for mouth)Punch 3 x Whisper White Scallop Ovals (embossed with Lacy Brocade EF for hat trim) Punch 1 x 1/2" Circle (for nose)Crumb Cake ink & sponge for beard & hatBlushing Bride ink & sponge for face & nose


Thanks For Looking,
TRICIA 

Tuesday, 9 October 2012

12 Weeks of Christmas WEEK 1 - A Simply Scored Merry Christmas

Welcome to the first of my 12 Weeks of Christmas Posts. Today's project is a card I designed to demonstrate the Simply Scored Tool and its many many uses.  I started with making a rosette in Be of Good Cheer DSP on the base plate of the Simply Scored tool (inches).  Then I scored a border around a piece if Very Vanilla using the metric plate.  Then using the Diagonal Score Tool I made a matching envelope using Very Vanilla & Snow Swirled stamp set in Cherry Cobbler.  It is a simple looking card but quite elegant I think.  

Simply Scored Merry Christmas
Stay tuned later in the week for another Christmas Project!


Stamp Set: Snow Swirled, More Merry Messages.
Paper:  Cherry Cobbler, Very Vanilla, Be Of Good Cheer DSP 
Ink:  Cherry Cobbler. 
Cool Tools:   1" Square Punch, Simply Scored Tool ,Diagonal Score Plate & Metric Score Plate, Glue Gun, Silicone Craft Sheet.

Thanks For Looking,
TRICIA 


Tuesday, 2 October 2012

Affection Collection Island Love

I must say I am loving all the Holiday Catalogue stamp sets at the moment.  I just discovered Affection Collection and it is really growing on me.  I am participating in another swap (yes I know, I am a swap addict) that calls for a Holiday Catalogue card, using only stamps from this catalogue. I tried to use only things from the this catalogue but had to dip into the main catty for the crochet trim and rhinestones.    I have been itching to try out the Affection Collection stamp set with all it's intricate swirls and fonts.

For my card I have used Island Indigo (an old favourite of mine) and Cherry Cobbler with a dash of Very Vanilla.  I based the colours on the DSP I was using from the Festival of Prints Designer Series Paper stack. There are so many gorgeous designs in this stack and it is only $11.95!

I based the design of the card on this card by Sherri but mixed it up a bit.  Did you notice the cotton ribbon? It is the new 7/8" Cotton ribbon in the Holiday Catalogue, which is so easy to stamp on.  I used the Border Banter stamp set for the diamond pattern and then trimmed off the edges and frayed them.  The Lacy Brocade Embossing folder is in the Holiday Catalogue too! Isn't it lush?  I can see lots of cards being made with this little folder very soon.


Stamp Set: Affection Collection, Border Banter.
Paper:  Island Indigo, Cherry Cobbler, Very Vanilla, Festival Of Prints DSP 
Ink:  Island Indigo, Cherry Cobbler. 
Cool Tools:  Lacy Brocade Embossing Folder, Big Shot,  Scallop Trim Border Punch, 1" Square Punch, Rhinestones, 7/8" Cotton Ribbon, Victoria Crochet Trim

Thanks For Looking,
TRICIA 


Monday, 1 October 2012

Holiday Catalogue Ornament

Ok, so I am jumping on the ornament bandwagon.  How could I not?  It looks so lovely sitting there on the front cover of the Holiday Catalogue...I just had to give it a go right? I went to visit my stamping buddy Leonie and we had a lovely afternoon making our very own ornaments.

Well lets just say I came out of it with less burns than last time which is always nice.  To make this you need a hot glue gun (hence the burns - we are still not good friends) and the new silicone mat for starters, then of course the stamp set and matching framelits come in handy also.  It wasn't too hard, just time consuming stamping and cutting all the pieces.  Like anything if you break it up into stages it is easy.

SO what do you think?


If you would like to make your own ornament plus a few others I am running a Holiday Ornament Class on Thursday 25th of October here at my house in Leopold.  Places are limited (otherwise we will be there all night!) so if you would like to come along please do contact me on 0411113530 or email me at ftaraineri@bigpond.com to book your place.